AI Assist
NotebooksObservable’s AI Assist is powered by the ChatGPT language model. AI Assist accelerates the notebook development process by helping you write SQL and JavaScript, fix errors, and explain how code works, to break through development obstacles.
AI Assist is available to all users, but only Pro and Enterprise accounts include a starter pack of tokens (see our Pricing page for the exact number).
Getting started with AI Assist
To open AI Assist, first select the button illustrated by the sparkle icon in the right sidebar menu:

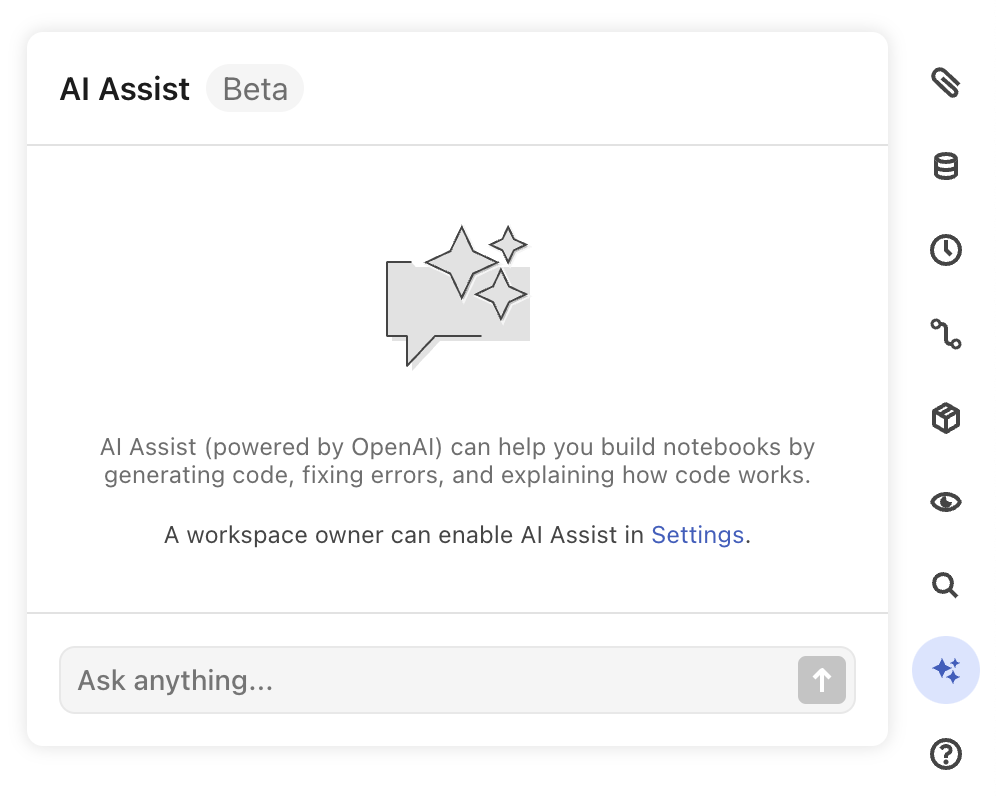
If you open up AI Assist and your workspace isn’t configured with an OpenAI API key yet, you will see the following AI Assist panel with a message informing you that a workspace owner can enable AI Assist in settings:
If your workspace already has AI Assist enabled (it is enabled by default), you should be able to start interacting with the AI chat right away:
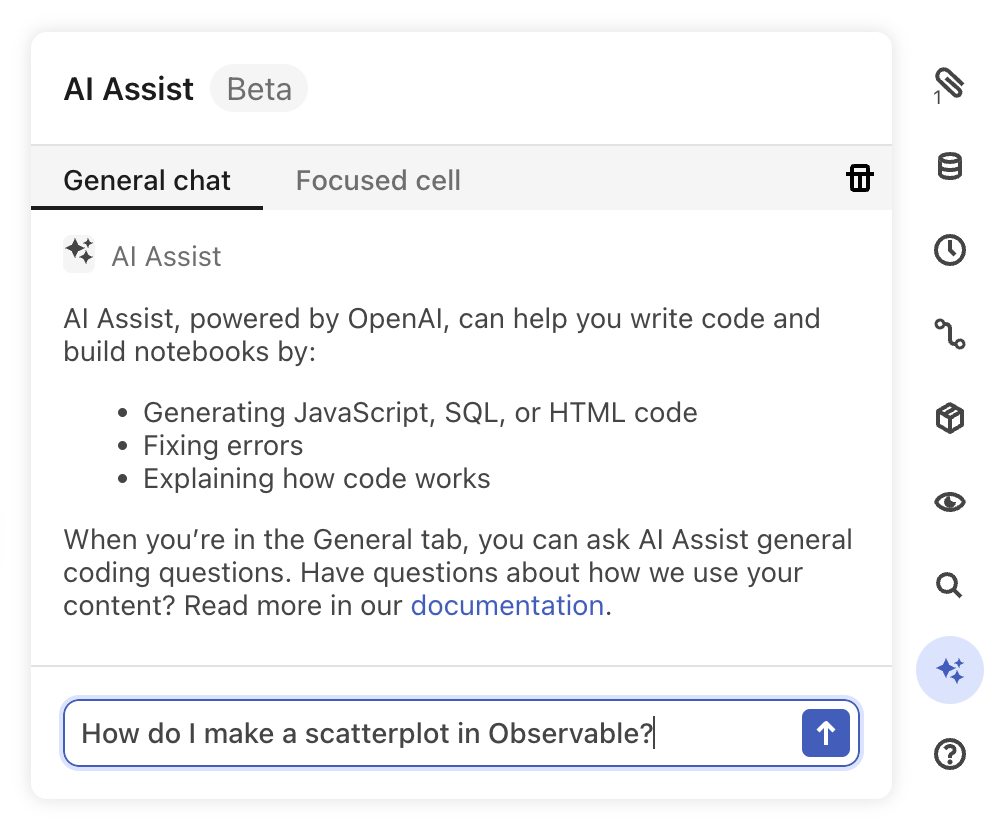
If you are focused on a specific cell, you are presented with more specific assistance from AI Assist:

Enabling AI Assist
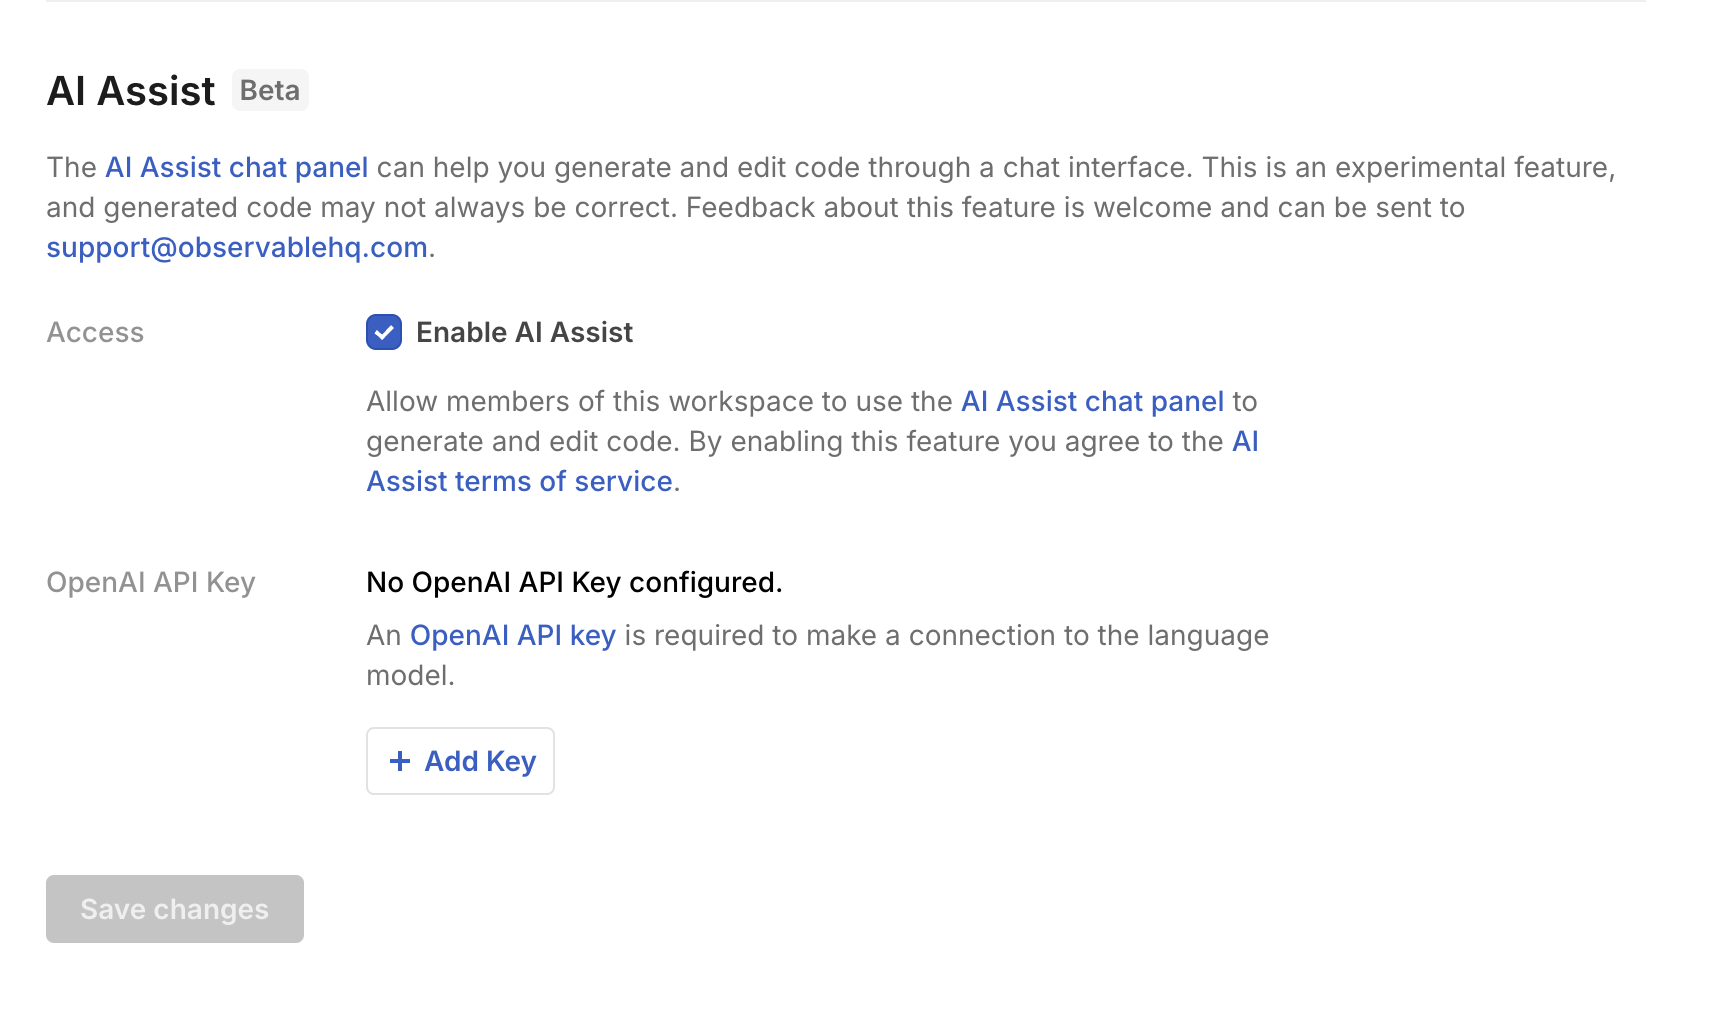
Workspace owners can enable AI Assist for a workspace. As a workspace owner, open up your Settings panel and scroll down to the AI Assist section on the General Settings page.
Select the Enable AI Assist option and then select the + Add Key button:
You are presented a modal to enter in your API key:
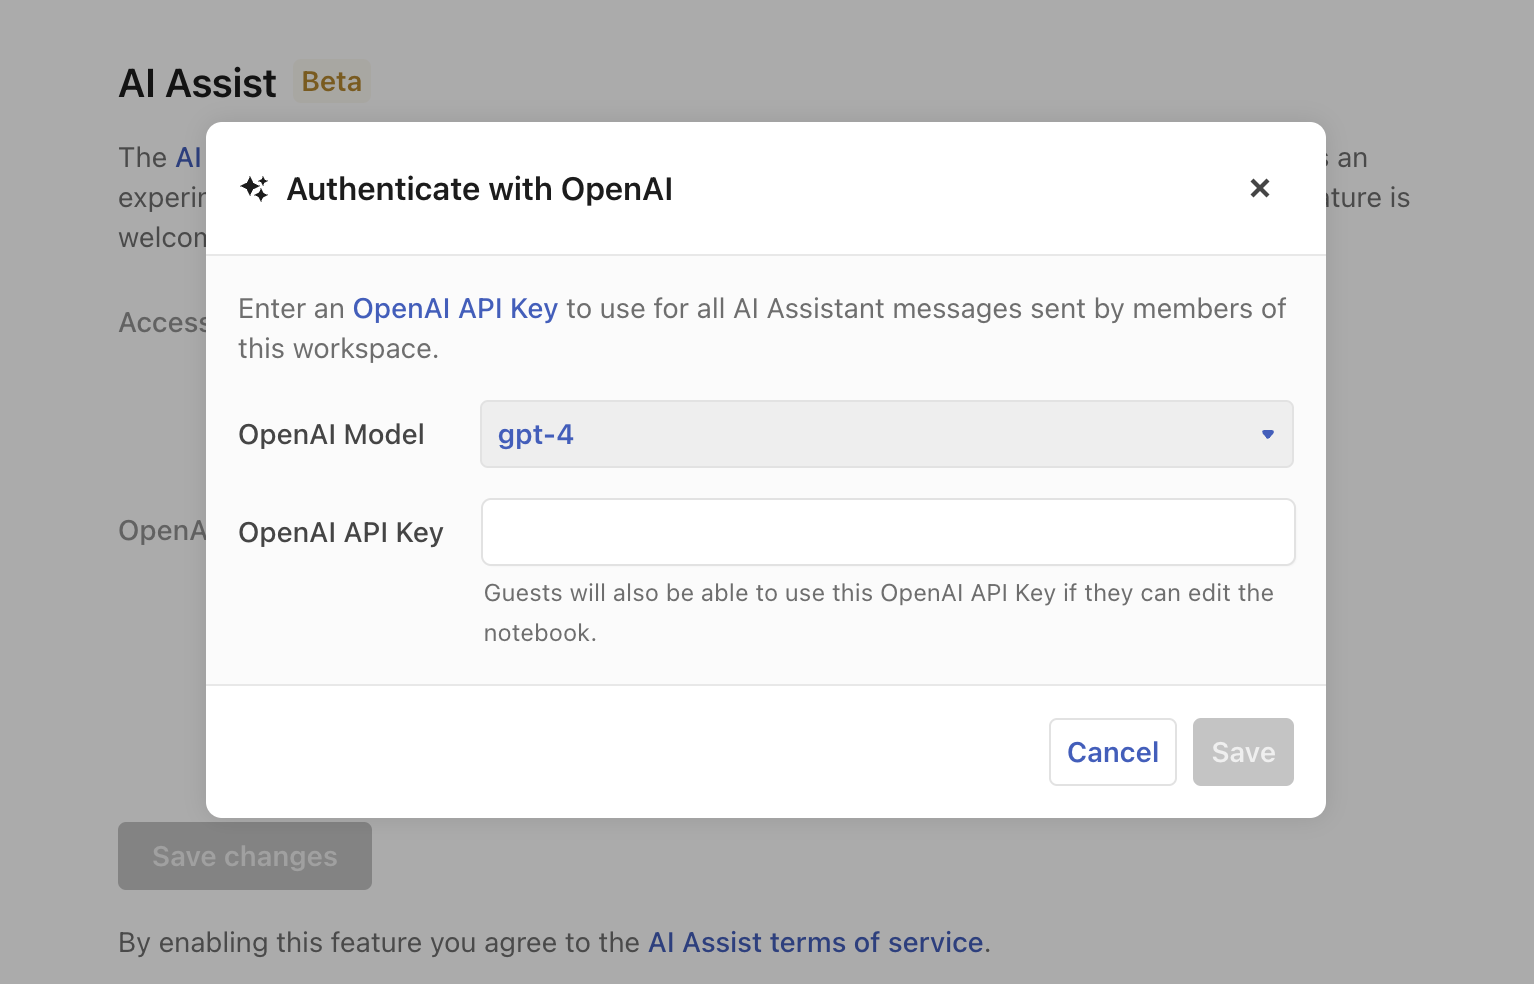
After you enter your OpenAI API Key, you should then make sure you have selected the GPT model you prefer (gpt-4 or gpt3.5-turbo-16k) and select the Save button to save your changes.
Note
ChatGPT 3.5 is significantly less expensive (see the latest pricing from OpenAI for up to date price comparisons) than ChatGPT 4. ChatGPT 4 is 40% more likely to “provide factual responses.”`
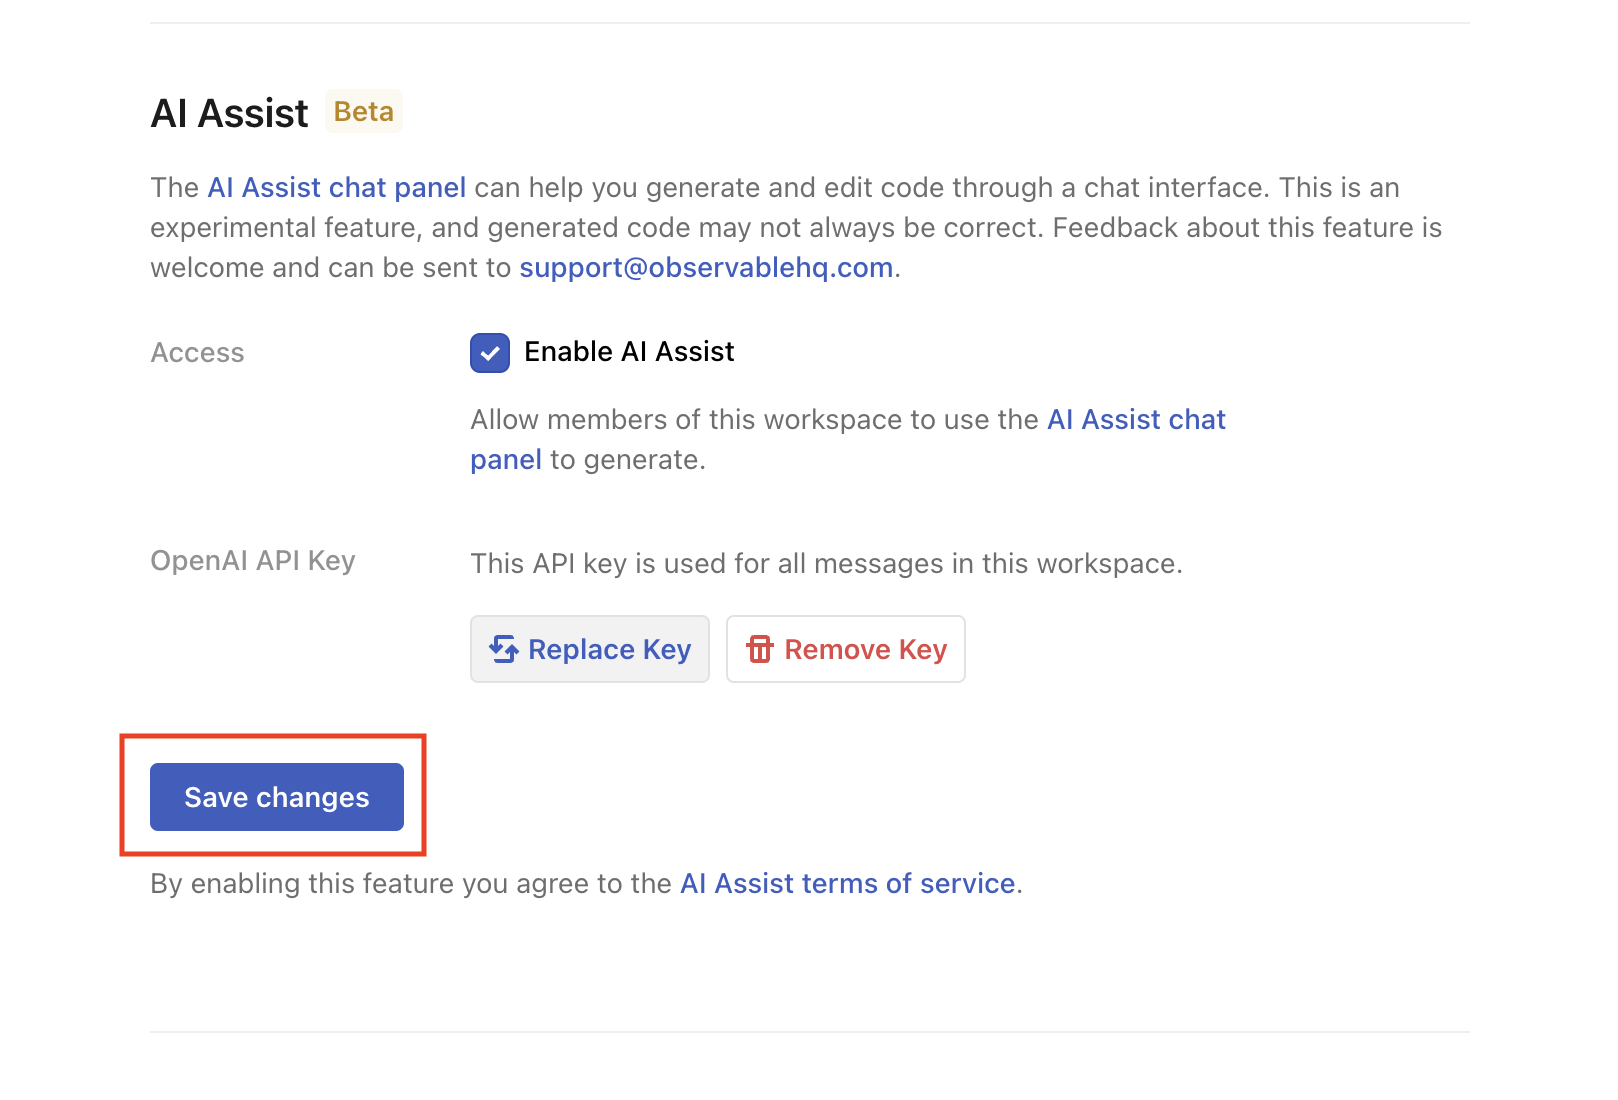
Once saved, you can see that AI Assist should be enabled, so you just need to select the Save changes button to save the changes and start using the feature.
Managing your free quota
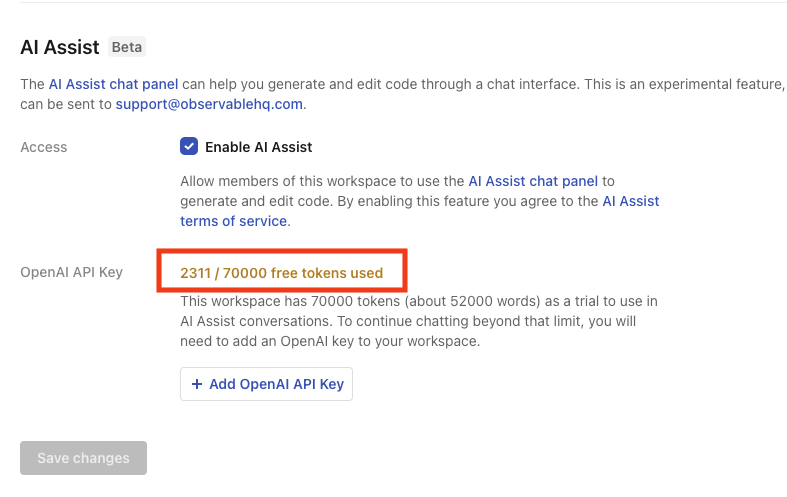
After you enable AI Assist, if you have any, you will see your AI Assist free token quota in the AI Assist section of your workspace Settings page, as pictured here:
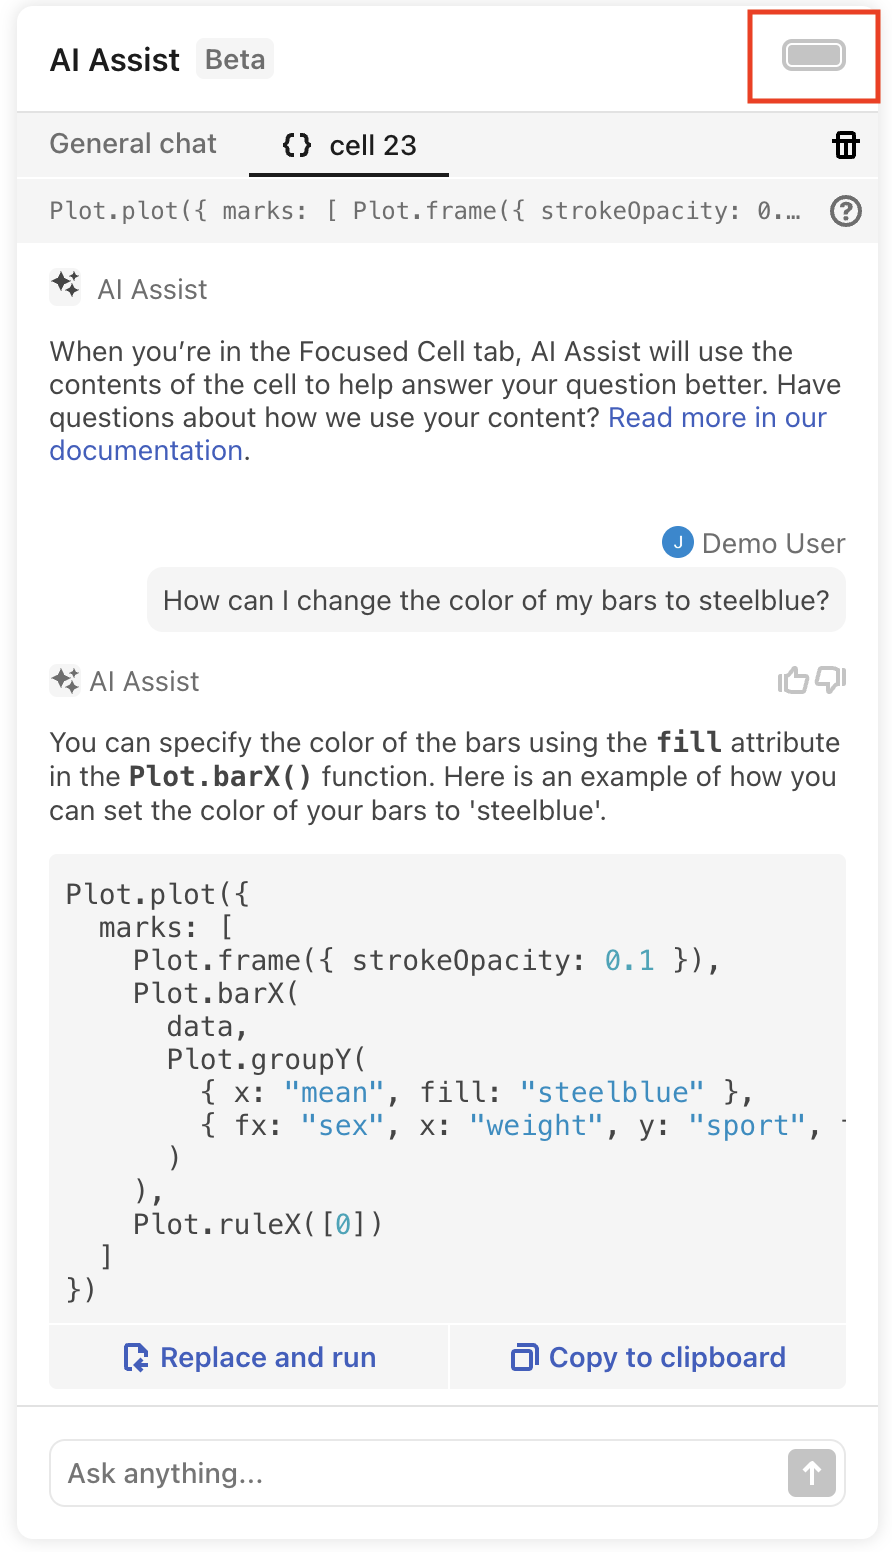
Also after enabling, you will have a battery-like quota indicator in the top-right corner of the AI Assist panel, providing you will some sense of the number of free tokens you have left:
When you run out of free tokens, your quota indicator will show as empty and you will be asked to enter an OpenAI API key to continue to use AI Assist:
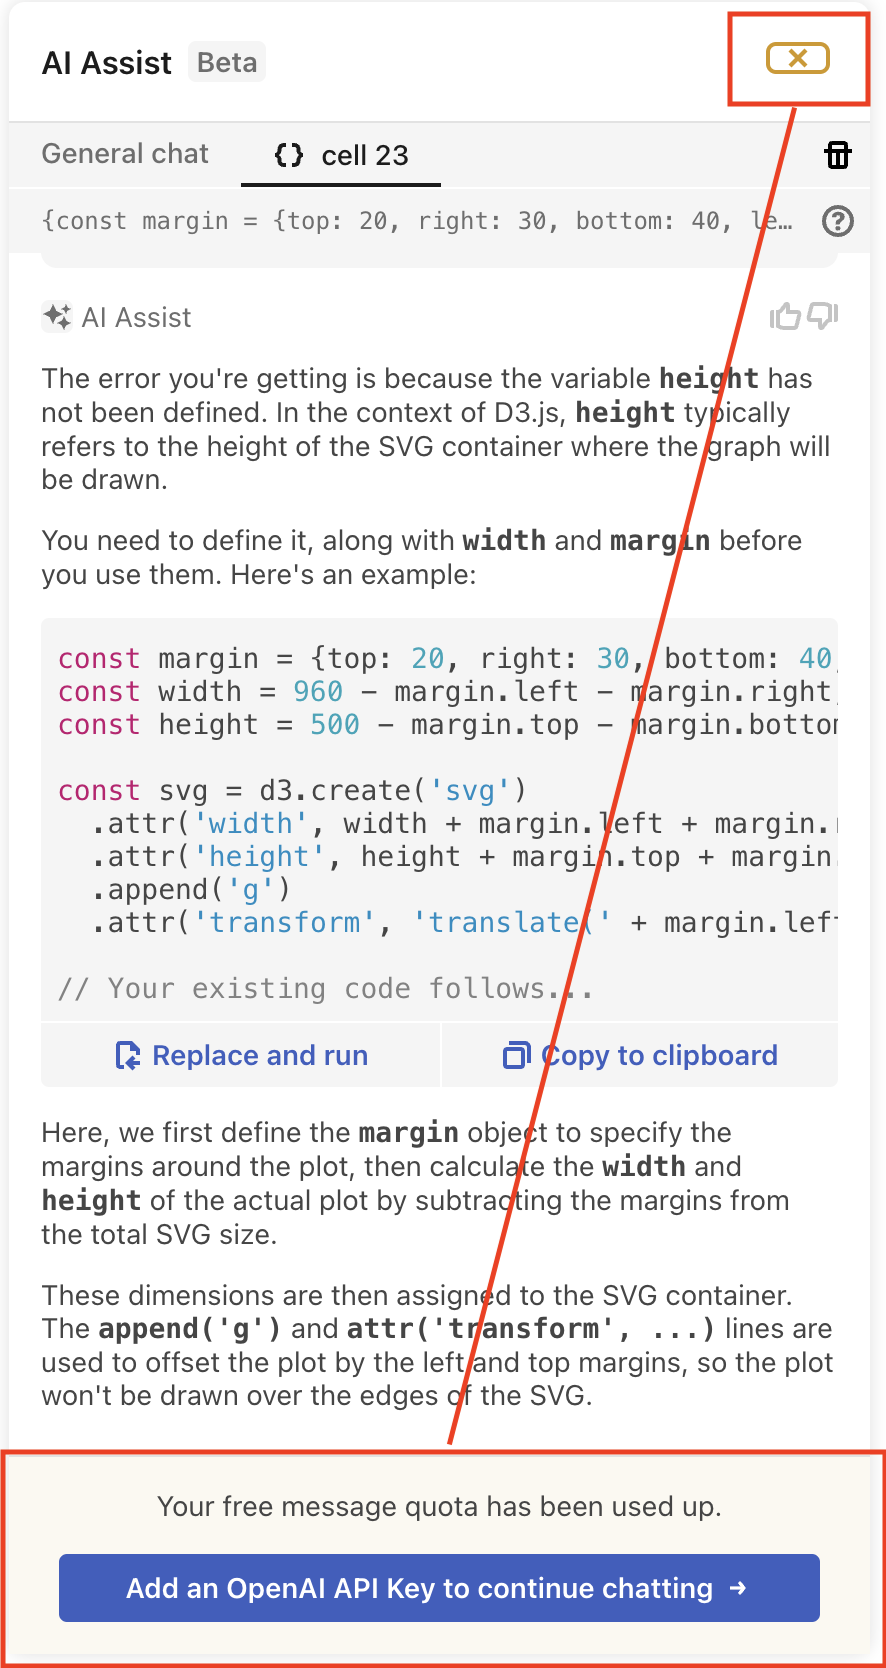
Follow the Add an OpenAI API Key to continue chatting button or enter your API key via your workspace Settings page to add your OpenAI API key.
Using AI Assist
When asking a question from AI Assist, you may be looking to get code back to use in your notebook development:
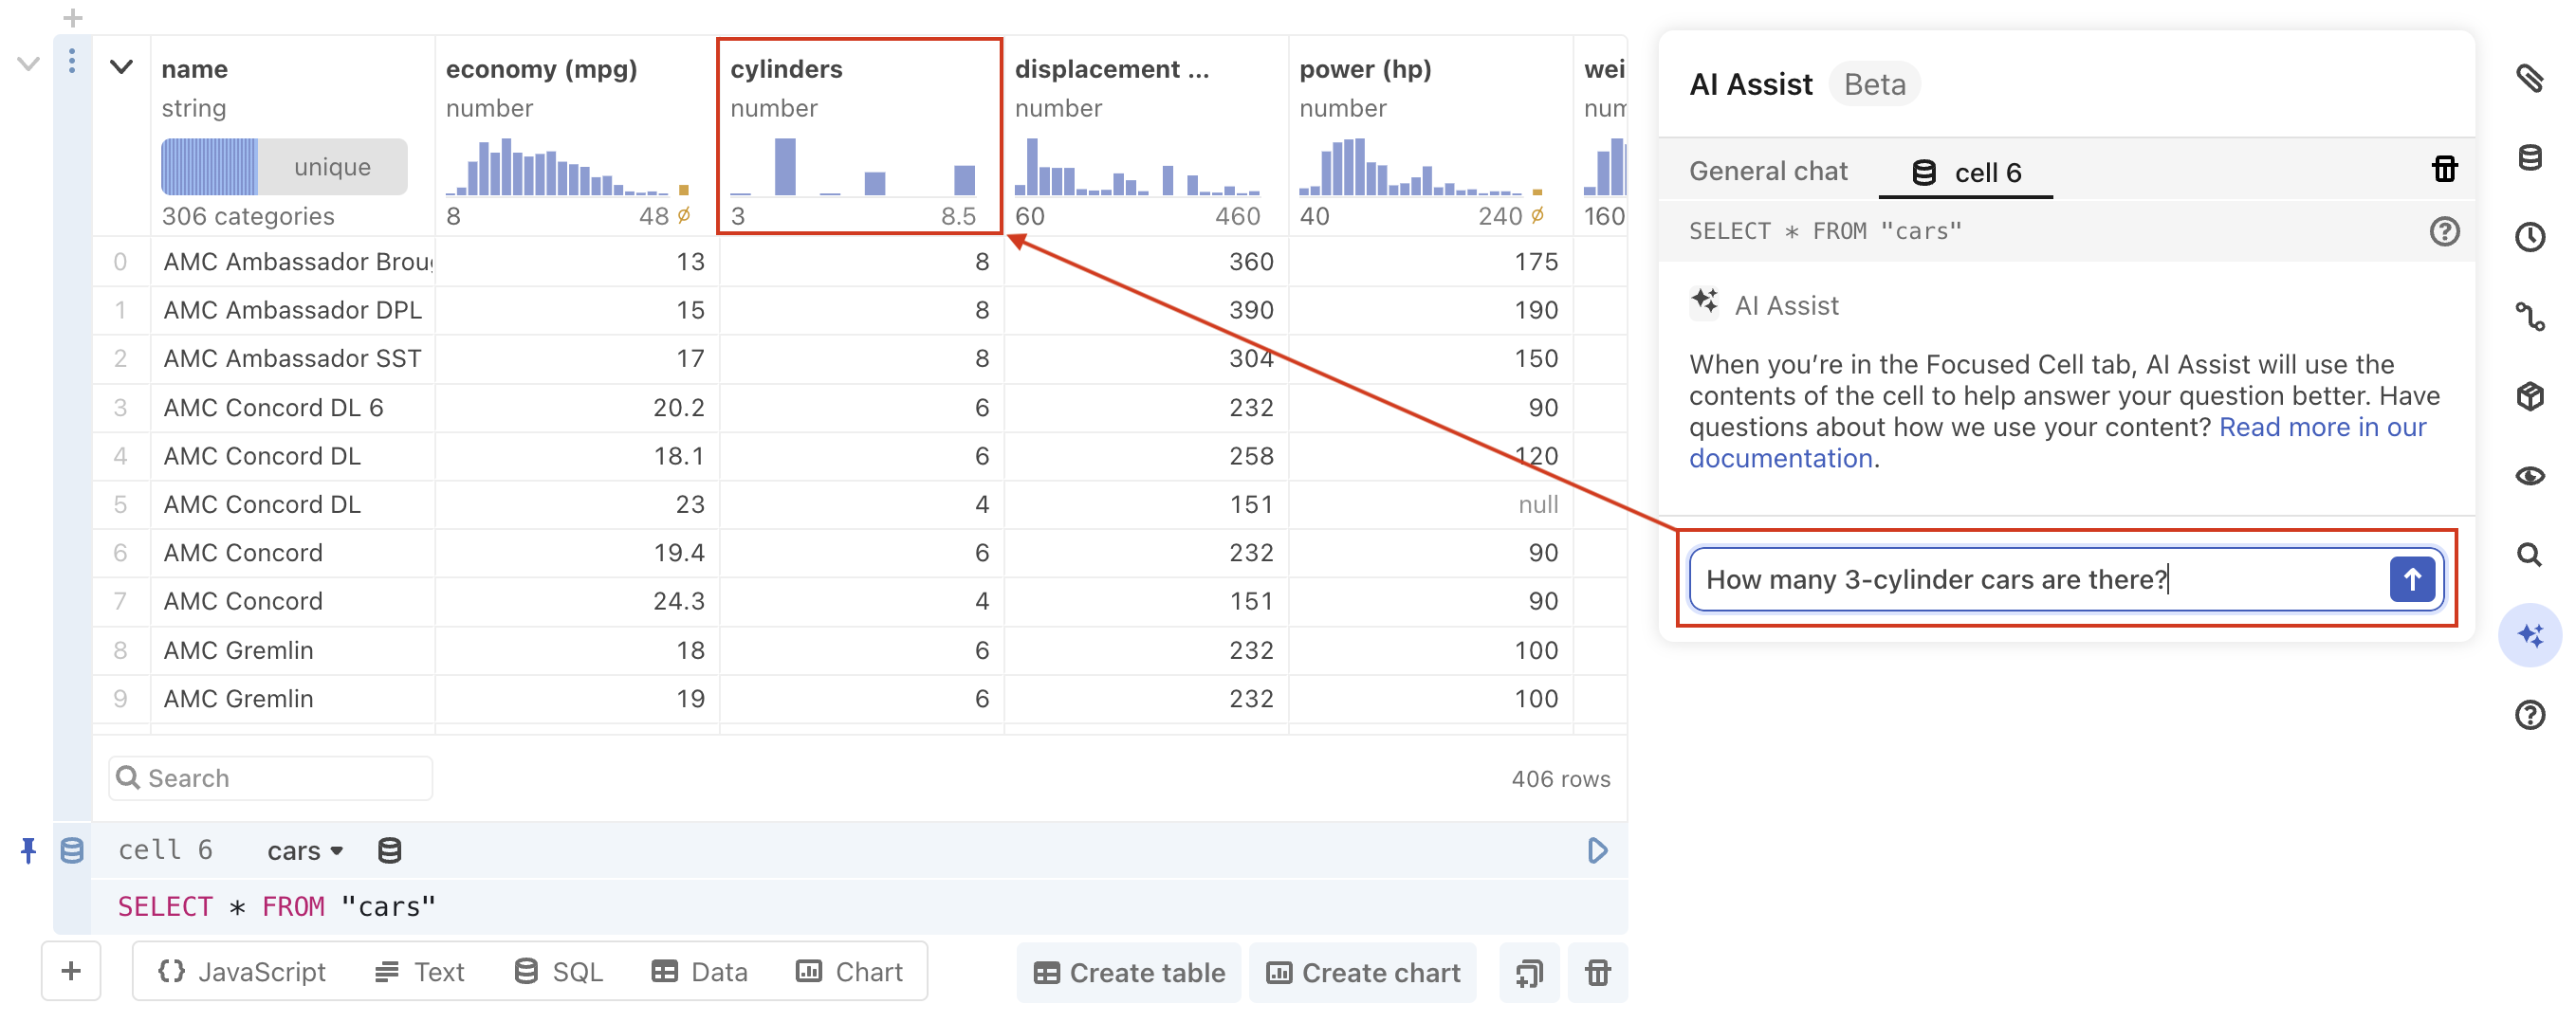
Once you have code suggestions back from AI Assist, you can easily inject that code into your notebook with one click.
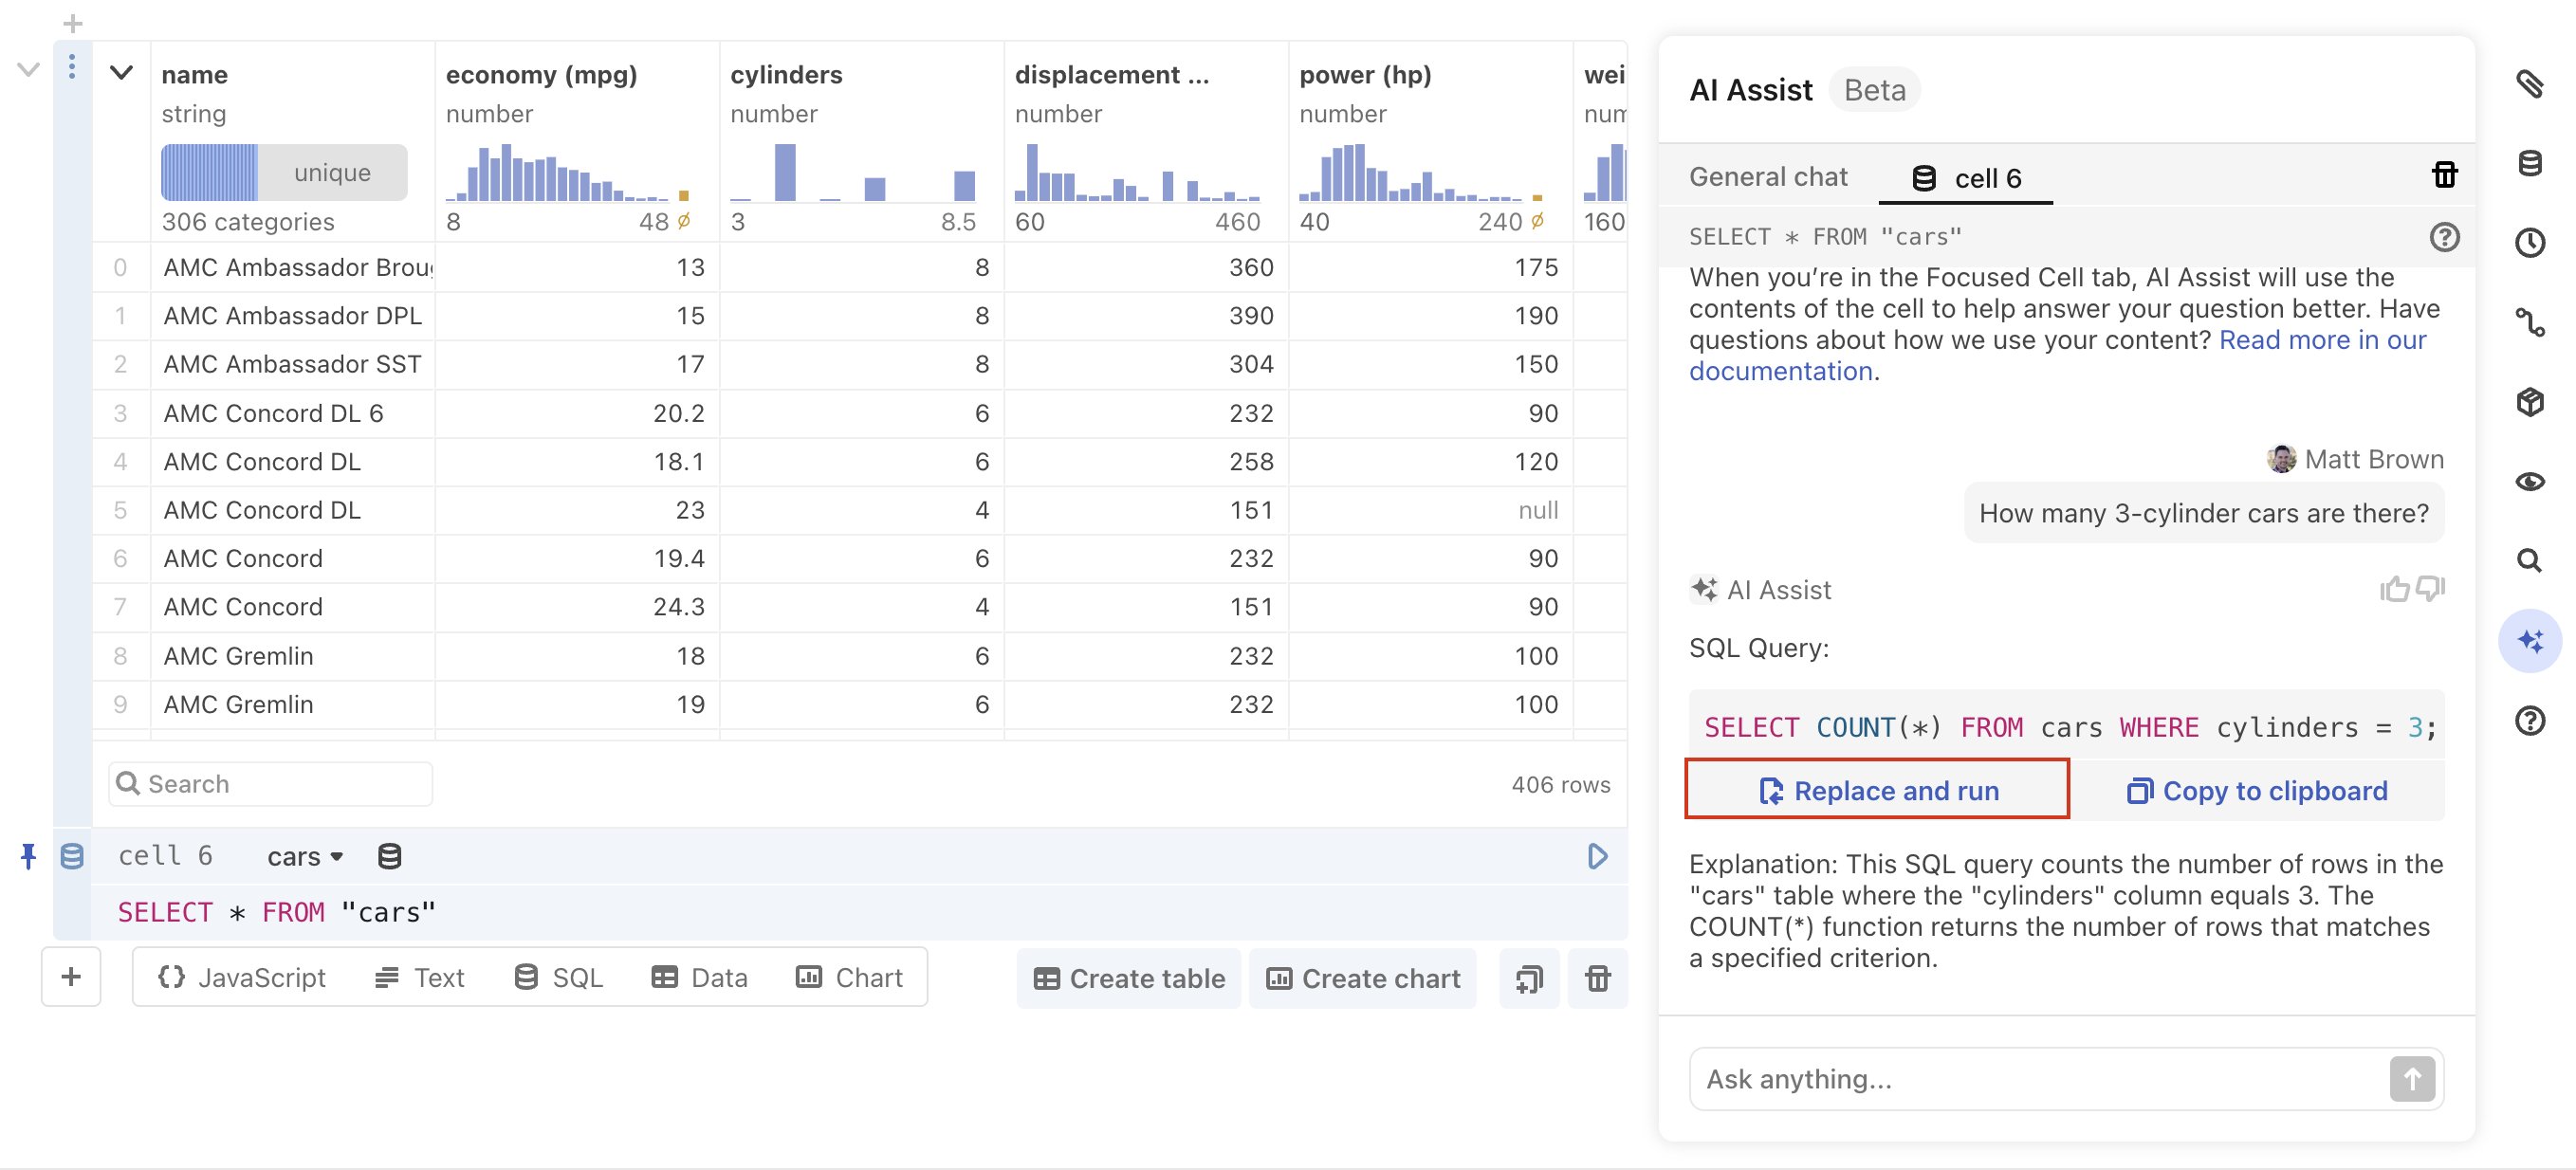
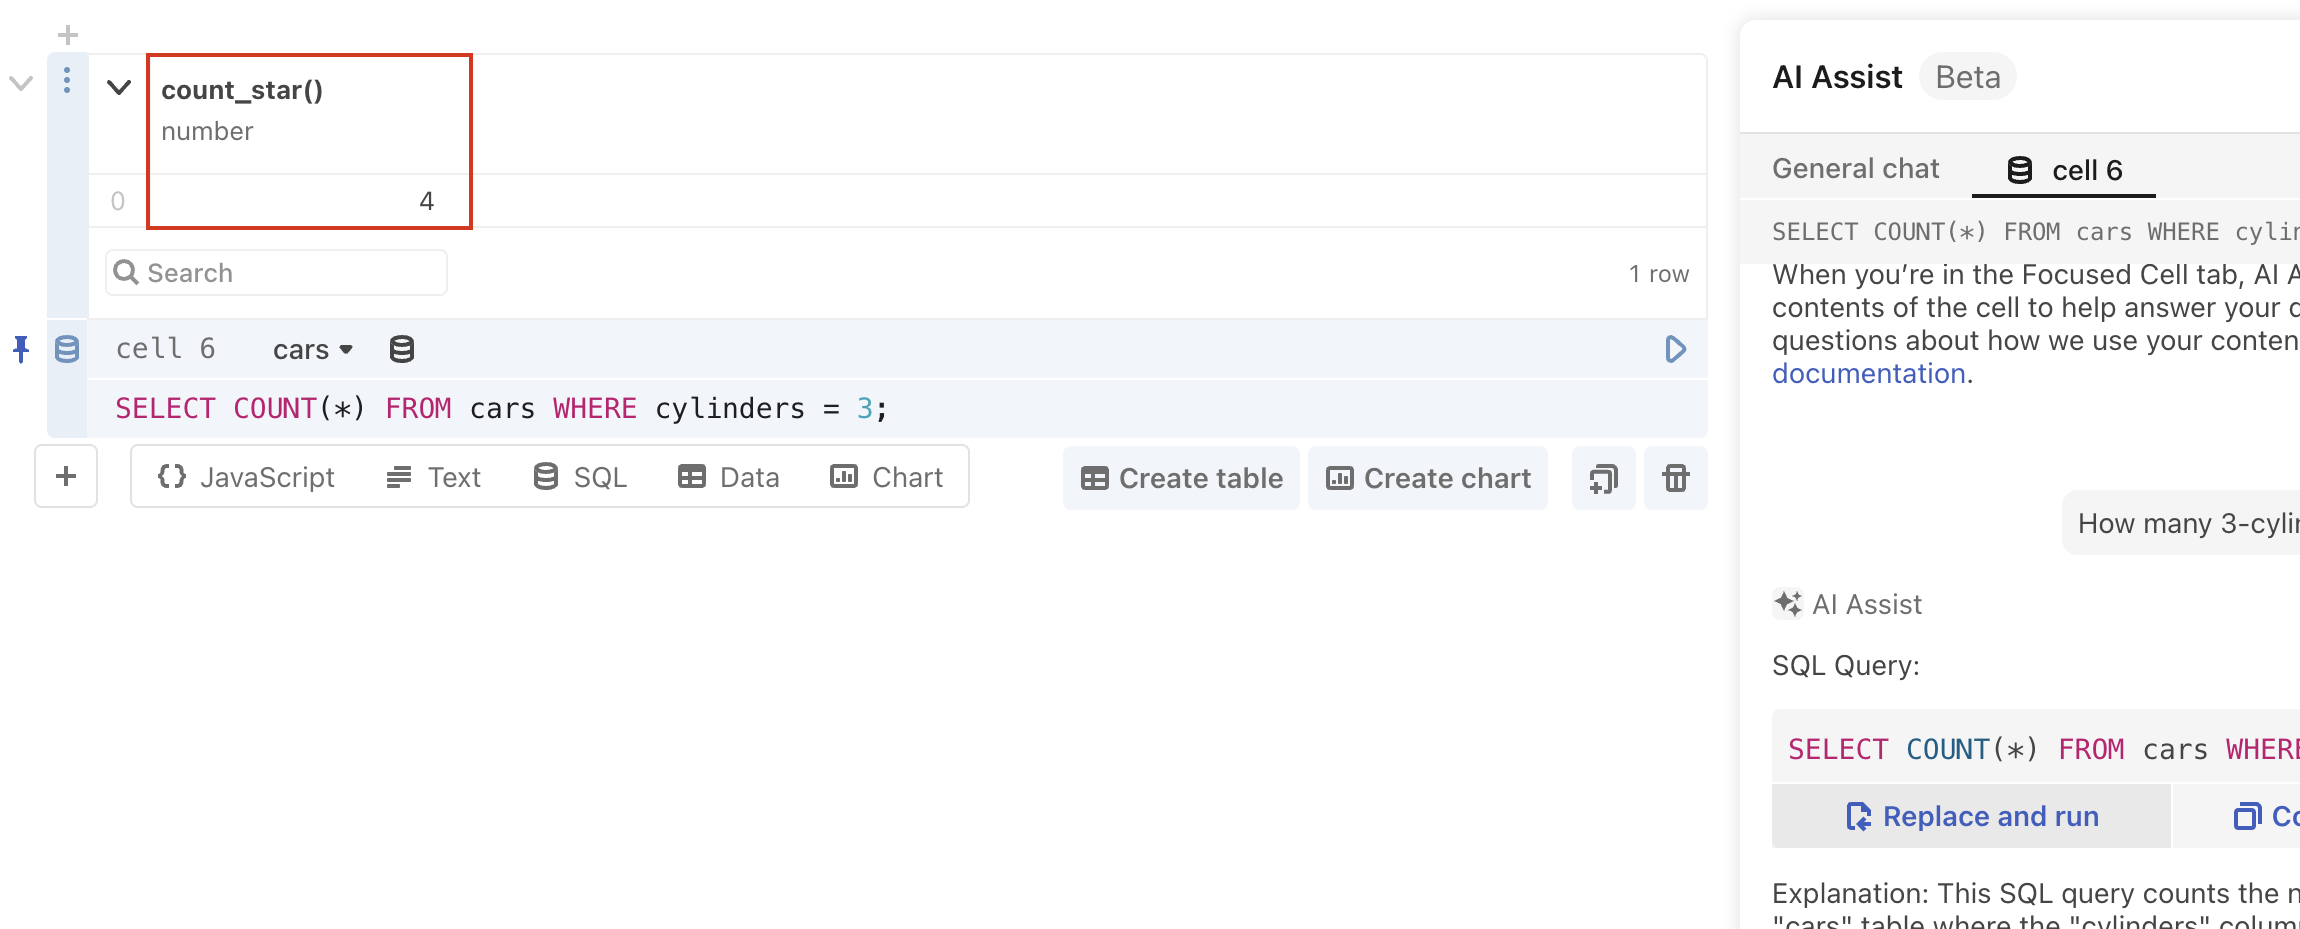
Observable instantly shows you the results:
Example prompts
- Write SQL:
Write a SQL query that...<describe results>.
- Explain code:
Explain what this code does.- include cell’s code in the context
- Explain an error:
What does this error mean?<error>
- Fix an error:
Given this error<error>, fix this code.- include cell’s code in context
- Generate a Plot chart:
Using Observable Plot, create a chart that...<chart description>.
- Generate a D3 chart:
Using D3 create a chart that...<chart description>.
Context
Note
AI Assist sends at least 500-700 tokens of context for each request. This does not include the tokens of context included from the notebook’s contents, which will vary depending upon the contents of the notebook in question.
General (Notebook) Context
AI Assist can be used in two different contexts: a general context and a cell context.
When no cell is selected and a you open the AI Assist panel, you are in the AI Assist’s general context. In the general context, users can chat with the AI Assist as if it were just a regular instance of ChatGPT. It won’t know anything about any of the cells’ contents and it will not have information about the notebook in this mode (unless the user specifically copies and pastes the content as AI Assist input).
Cell Context
When you select a cell while interacting with AI Assist, you will be in the cell context. When in the cell context, AI Assist automatically attaches the editor contents to the prompt to help you with a related question. For SQL cells, the associated database schema is also shared with OpenAI to assist you with query writing.
The database schema associated with a focused SQL cell is shared with OpenAI by default, as it is prepended context to any message sent to ChatGPT via AI Assist under those conditions. You may optionally include the cell editor’s contents by checking the box at the bottom of the panel that says “Include code from <cell_name>”.
Personas
AI Assist will automatically invoke one of two personas, depending on the context: General chat or SQL persona.
General chat
If you are not focused on a cell, and are therefore in general context, you will interact with the General chat persona when communicating with AI Assist. In this persona, AI Assist will be prepend messages to ChatGPT with information from Observable’s and Plot’s documentation and API. This allows the user to ask questions specifically about Observable and Plot and receive runnable code (in most circumstances).
SQL
When you focus on a SQL cell, the SQL persona will be activated. Metadata about the your selected data source (the database schema) will be sent automatically with any message, so that you can ask AI Assist to create complex SQL queries (including joins) for you using the actual column names in the table.
Data Privacy
We at Observable want to ensure you understand how AI Assist works with respect to data privacy, so you can be confident using it as a development tool:
- We do not train the AI model with your data, neither does the third-party AI service (OpenAI). So there is no chance of intellectual property you share with the model being leaked to another customer using AI Assist.
- We do not share your database connections with the AI model. So the values of specific rows from tables in your connected databases are not shared with the AI model by using AI Assist with them connected.
- We do share schema information and project code as model context. So column names or specific bits of code could be sent to the model.
- AI Assist is backed by Observable’s secure data platform. So it is afforded the same security posture as the rest of the platform. For more information, read more regarding our platform’s security model.
Workspace admins can turn off AI Assist via Settings>General>AI Assist. This will turn the feature off for all team members of the workspace.
Please see our official Terms of Service for more on this.
Known Issues
- Responses may require editing before they are able to be run in the notebook.
- To ensure your code is compatible with Observable JavaScript, read about Observable JavaScript.
- If a response is not valid, asking the same question a second or third time may yield better results.
Limitations
- The model’s knowledge of Observable JavaScript and the Plot API are based upon prompt engineering, which incurs cost and can affect the accuracy of the responses. We try to limit the number of tokens spent on prompt engineering, but it is currently required to receive accurate responses. We are continually exploring ways to limit tokens spent and increase the accuracy of responses.
- Conversations will be deleted after 3 days.